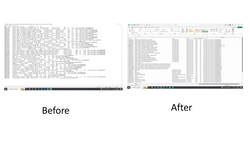
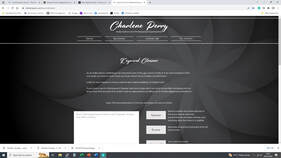
 Finding the right keywords to include in an Amazon Ad can be a very time consuming activity. Gurus like Bryan Cohen, of Best Page Forward, recommend using 100 - 150 keywords in an ad, and also recommend creating 5 to 10 ads a week. So, that mean finding anywhere between 500 and 1,500 keywords A WEEK! That’s a lot of keywords and it could take a lot of time researching them all. If it takes 1 minutes to research one keyword, that could be as much as 2½ hours to generate enough keywords for a single ad. For 5 ads that could be 12½ hours a week. Who wants to spend that much time on a single marketing activity? Not us, that’s for sure.  So, we love it when we find a short-cut that will save us some time. To give you some idea of how long it took us to find 150 keywords and create an ad with them, the total was 25 minutes (if you exclude making cups of coffee and answering the telephone). It took us longer to write the first draft of this blog about it! I think most of us can squeeze 25 minutes out of our busy schedules if it means getting an increase in sales for our books. So, how is this magic worked? I’m going to take you through it step by step. The first few steps you may not need to do at all, or you may need to do them only once. The later steps are the ones you have to do every time to generate a list of 100-150 keywords.  If you have any questions after reading this and trying it out, ask them in the comments section and I’ll get back to you as soon as I can. There are 36 steps to this procedure, which seems like a lot, but some of them describe just one mouse click or screen tap. Once you are familiar with it, the whole process takes a very short time, so don’t be put off by that number. You may want to do a “split screen” on this, so that you can read the instructions from the blog and then try them out as we go along. Or you may prefer to print this blog and follow the instructions that way. OK, let’s go!  1. If you don’t already have the Google Chrome browser installed on your PC or laptop, download and instal it. 2. Once you have Chrome installed, open it and instal “Kindletrends Also Bought downloader” It is free. It will instal into Chrome automatically, so you don’t have to do anything (you can also instal the extension into other browsers, but we don’t have a full list which is why we specify using Chrome). 3. Open Chrome and look at the top right hand corner of of the page and you will see 3 vertical dots. Click on those to access the Chrome settings menu. 4. Click on “Extensions” and then “Manage extensions”. 5. Locate the “Also Bought” downloader extension and click on “Details”. 6. Locate the line that says “Allow in incognito” and switch it on if it isn’t already switched on, then exit back to the Chrome home screen. That is the end of the steps that you will only have to do once. Now for the steps you have to do every time.  7. At the top right hand corner of Chrome, find the 3 vertical dots again and click on them. 8. Click on “New incognito window”. The reason you use incognito browsing is so that Amazon doesn’t identify you from your IP address and start to offer you the sort of books that you normally read. You want to find the sort of books that you write, which may be different. Now you are going to identify books like the ones you write. You may have some of these by other authors on your own bookshelves, which is a good place to start. If you haven’t, then you are going to have to take a more “trial and error” approach. We use Publisher Rocket to help us identify books and authors in the categories in which we are advertising, but if you don’t have that, don’t worry. I’ll assume you don’t have any relevant books to hand, and you don’t have Publisher Rocket. 9. In your incognito browser, go to the Amazon website for the country in which you wish to advertise. For example, you may live in UK but want to advertise in the USA, so you need to go to Amazon.com. Conversely you may be the USA but want to advertise in the UK, in which case you need to be on Amazon.co.uk. The site you choose will affect the results of your search, which you are going to do next.  Some authors have international popularity, but many don’t. There is no point in including keywords relating to an author who is popular in the USA but no one on the UK has ever heard of, and vice versa. 10. In Amazon’s search bar, type in a search term for the sort of books you write. For example, you could type in “historical romance” if that is what your write. But you may want to narrow that search down a bit by adding tropes from your book, such as “enemies to lovers” or “pirates” or whatever tropes you have used in your book. You can also search using an ASIN, a book title or the name of an author if they are in a category relevant to your book.. 11. From the search results, choose a book that you think is similar to yours and click through to its sales page. Make sure you are viewing the version you are going to be advertising, eg ebook, hardback or paperback.. 12. Read the blurb to check that it is like yours. You may even want to read a bit of what used to be called the “Look Inside” but now is just referred to as a sample. 13. If you are happy that the book is one that you might find on the same shelf as yours in a bookstore, go to step 14. If not, go back to step 11 and repeat. "You will see a whole jumble of data that doesn’t make much sense." 14. Now scroll down the page until you get to the carousels that are named either “What did customers buy after viewing this item?” or “Customers who viewed this item also viewed” (the words may vary a little depending on which country you live in). The former is the best but isn’t always displayed, so you may use the latter, but you can also use both if you wish. You will get some duplication in your results, but there is a simple step to remove them later. 15. Next to the text described in step 14, you will see a little icon that looks like a blue fairy cake with a red candle. This is the icon for the “Also Bought” plug-in. Click on this. The books displayed will start to scroll across the screen, which indicates that their details are being downloaded. When the scrolling stops, the download has finished. This could take up to a minute, depending on how many books there are in the carousel. 16. You may repeat steps 11 to 15 to gather more keywords, or you can go straight to step 17 and return later if you think you need more keywords. 17. Open “file manager”, locate the downloads folder and open it. 18. Open Excel (or whatever spreadsheet app you use) and open a new spreadsheet. 19. In the downloads folder, you will see the list of downloads that you created at step 15. There will be a .png version and a .txt version. The .png is an image of the book covers. You don’t need to use that. Double click on the .txt version to open it. You will see a whole jumble of data that doesn’t make much sense. DON’T PANIC!  20. In the text reader, go to “edit” and then “select all” to highlight the text, then copy it. 21. Paste it into the spreadsheet. It should now be nice and neatly displayed in columns, starting with the ASIN (Amazon’s catalogue number) on the left, then the title, series name, author name and then the other stuff. You can delete all the stuff to the right of the author’s name if you wish. 22. Repeat steps 17-21 for each of the .txt files you downloaded. 23. I don’t use ASINs in my keyword searches, but if you wish to you can. Everything I say from here on applies to them as well as to the other columns. 24. In an ordinary browser, Open “Keyword Cleaner”. This is a free webpage which will help you to clean up your keyword list (don’t forget to add it to your “favourites”, because you will use it a lot). 25. Copy the contents of one of the columns of your keywords from the spreadsheet. I always start with “title” and you will see why at step 34.  26. Paste that into the big box on Keyword Cleaner. 27. There are 6 buttons to the right of the big box and you will use at least 5 of them. 28. Click on the button marked “Separate”. This will remove any subtitles or series names that have been included with the title, providing they have been separated from the title by a semi-colon, colon, hyphen or brackets. They will re-appear in smaller boxes further down the page. 29. Click on the button marked “Format”. This will remove most of the special characters that Amazon Ads doesn’t like, if there are any in the list. 30. You can click on the box marked “Sort A-Z” but I don’t usually bother. Amazon Ads sorts keywords alphabetically after they have been entered anyway. 31. Click on “De-duplicate” This removes any duplicated entries. 32. Click on “Copy”. 33. Open a “Word” document (or similar) and paste the list of keywords into the document.  It may be necessary to clean up the list. It may be necessary to clean up the list. 34. Keyword Cleaner isn’t smart, so it can’t always recognise subtitles and series titles and remove them, so it may be necessary to “clean-up” the list a little bit more at this point. This means removing anything from the title that shouldn’t be there. For example, if we got the result “Ten Years To Doomsday a gripping intergalactic action-packed science fiction novel”, everything after “Doomsday” should be removed because it isn’t part of the title. Similarly in the result “Battle Cruiser Elite A Military Sci-Fi Space Opera Adventure”, everything after “Elite” would be removed. 35. Use the 6th button, “Clear”, to make Keyword Cleaner ready for the next lot of data you are going to paste in. 36. Repeat steps 24 to 35 to do the same for the columns marked “ASIN”, “Series” and “Author” in your spreadsheet. They shouldn't need any additional cleaning. At the end of the process, you will have a list of keywords that is duplicate free and ready to be copied into Amazon Ads.  You may want to check how many keywords you have and the quickest way to do that is to highlight the list, go to the “Review” menu on Word, click on “Word Count” and that will tell you how many lines of text you have, which is also the number of keywords in the list. If you haven’t got enough, go back to step 10 and repeat from there. And that is that. Once you’ve done it a couple of times you will be generating keyword lists in 25 minutes or less each time. If you have enjoyed this blog, or found it informative, then make sure you don’t miss future editions. Just click on the button below to sign up for our newsletter. We’ll even send you a free ebook for doing so.
0 Comments
Leave a Reply. |
AuthorThis blog is compiled and curated by the Selfishgenie publishing team. Archives
June 2025
|
 RSS Feed